With our Calendar app, you can activate Registration on your calendar and people will be able to get registered for the events using the calendar's registration form.
To activate the Registration feature:
- Double click on the calendar to open the Settings tab.
- Click on the Add-ons section.
- Open Add-ons Store.
- Here, hover over the Registration addon and click Add to site.

After registration, the data will be saved in the Guest List of your calendar. So, you can see the full info of your guests and export it as a .csv file if needed.
To see the Guests List:
- Double click on the calendar to open the Settings.
- Manage Events.
- Select the event and you will see the Guests list.

The Starter plan: 25 guests for each event.
The Pro plan: 100 guests for each event.
The Business plan: UNLIMITED guests.
If you want to adjust the general settings of the Registration feature that should be done from the Settings > Add-ons > Registration. All the changes done here will be applied to all of your events.
General info
Enable Registration:
In order to activate registration on a certain event, switch the toggle button on.

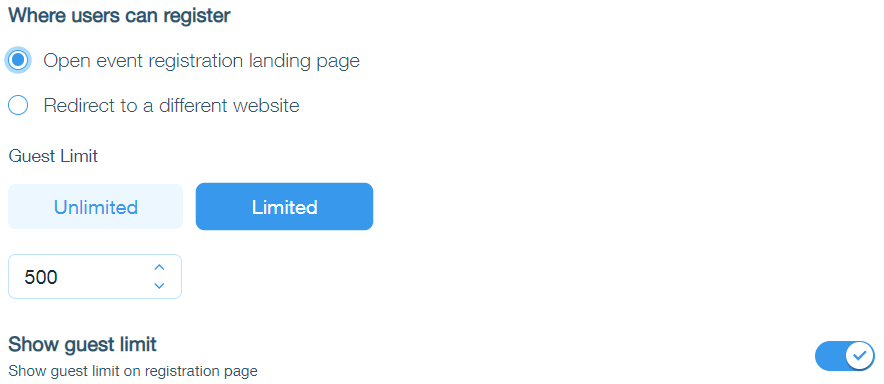
Where users can register: There are 2 options
- The users can register for an event on the landing page.
- You can redirect them to a different website by setting the URL of the website in the Page URL field.

This is the Guest List:
You can have unlimited registrants or you can set a limit.
You can set your required amount and after its expiry users will not be able to register for the event.
The guests limit can be shown or hidden, based on your choice. If you want to showcase the guest limit on the registration page, activate the Show guest limit toggle button.
You can set your required amount and after its expiry users will not be able to register for the event.
The guests limit can be shown or hidden, based on your choice. If you want to showcase the guest limit on the registration page, activate the Show guest limit toggle button.

Admin Email:
Through this option, you'll be notified each time a visitor registers for an event on your calendar.
Make sure to set a valid email address.
Make sure to set a valid email address.

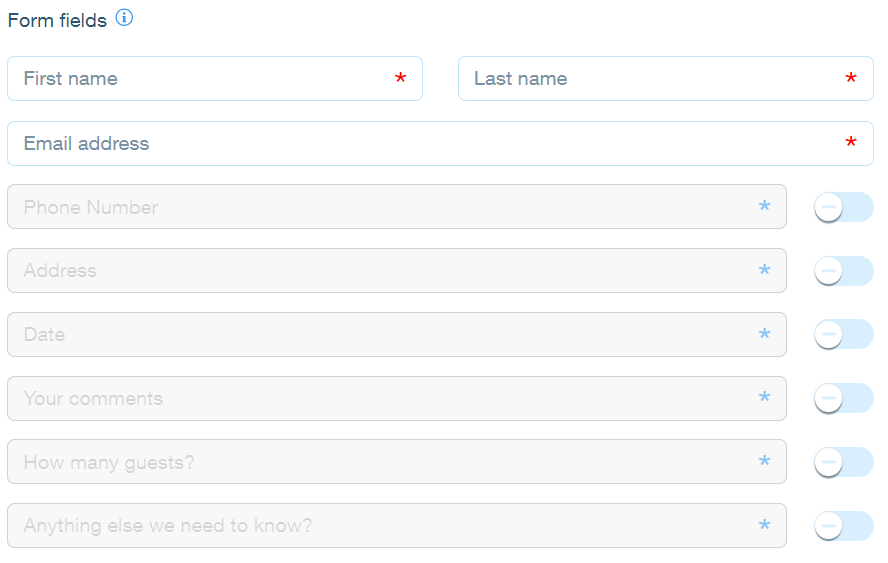
Form Details:
In the Form Details section, you can add more fields by activating the toggle buttons on RHS.


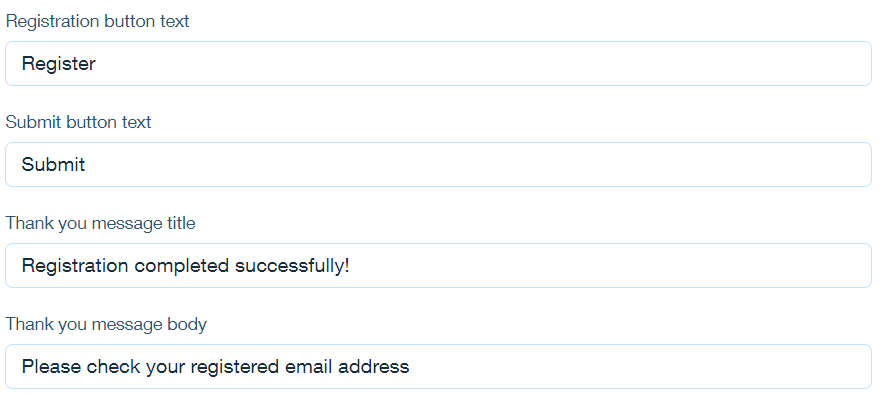
These are the Texts:
You can change the texts of the Registration and Submit buttons, title, and body of the Thank You messages.

Email notifications to users:
You can send emails to your users.
- Once the registration is completed.
- When you want to remind them of the event.
- When the registration is canceled.

You can change the text of the confirmation message, reminder, and cancelation next to the "Registration" button.


If you'd like to set different settings for some events, you can open the Manage window from the Settings and make the adjustments for each event separately.
Please note
The feature is supported in Premium plans.
Was this article helpful?
That’s Great!
Thank you for your feedback
Sorry! We couldn't be helpful
Thank you for your feedback
Feedback sent
We appreciate your effort and will try to fix the article